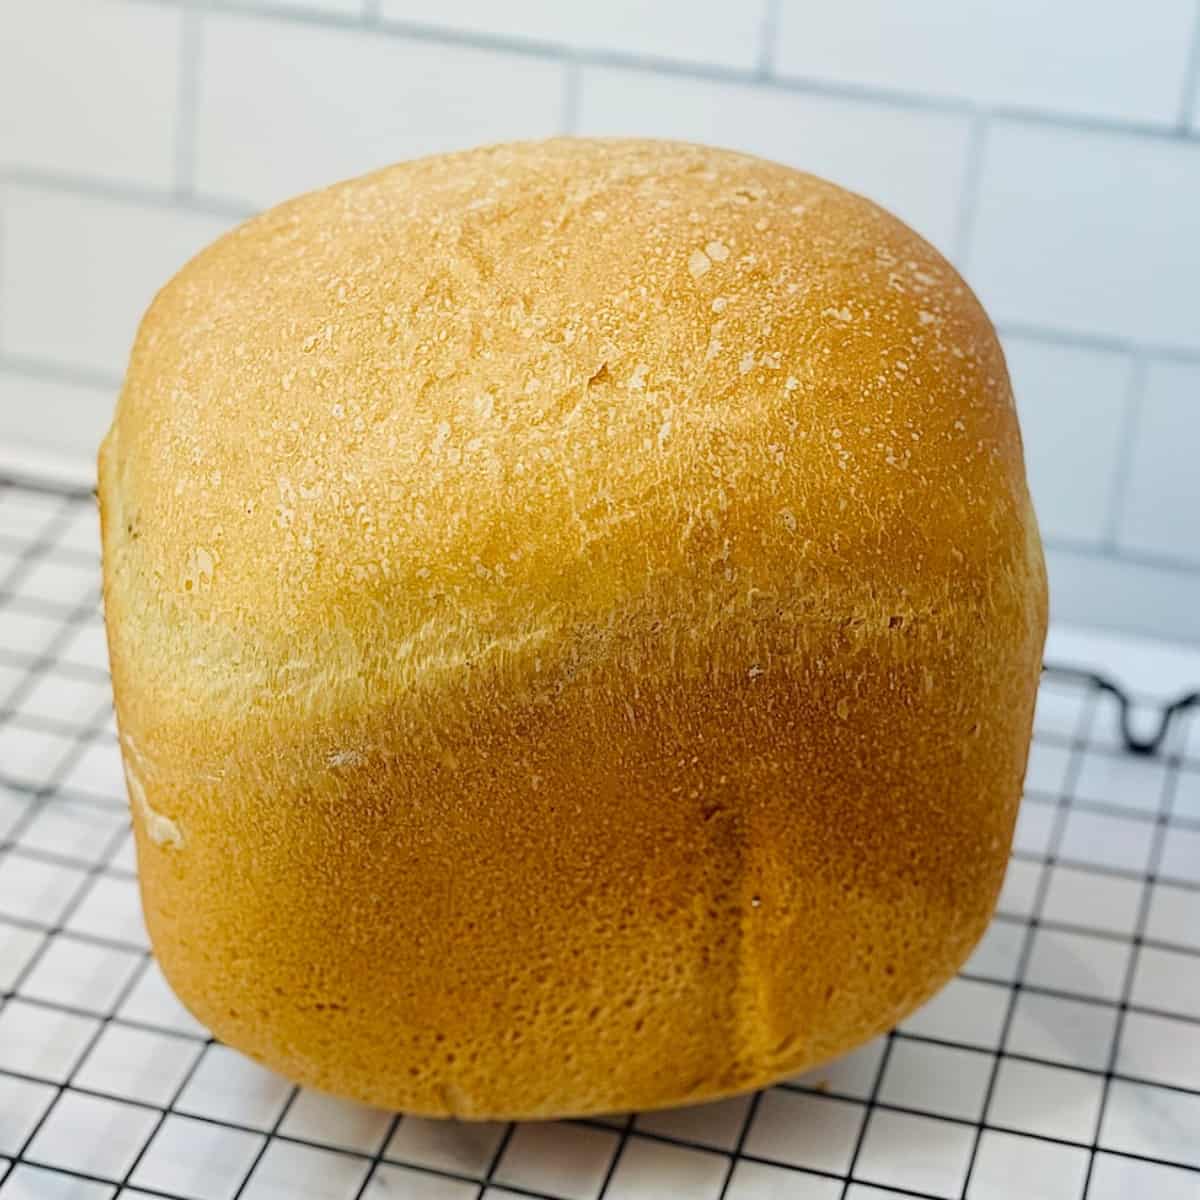
Master Fluffy White Bread: Your Easy Bread Machine Recipe Guide
Imagine waking up to the irresistible aroma of freshly baked bread filling your home. A warm, crusty loaf, perfectly golden, just waiting to be sliced and enjoyed. If this sounds like a dream, prepare to make it your delicious reality, because mastering fluffy bread machine white bread is not only incredibly simple, but it also delivers a taste and texture far superior to anything you’ll find in a store. The bread machine transforms what might seem like a daunting baking task into an effortless culinary triumph, allowing you to simply add ingredients, walk away, and return to a heavenly, homemade loaf.
For many, homemade bread feels like a luxury reserved for seasoned bakers. But with a bread machine, that perception crumbles faster than a slice of over-toasted bread. This guide will walk you through creating the ultimate soft, buttery bread machine white bread, perfect for everything from classic peanut butter and jelly sandwiches to a comforting side for your favorite dinner. Once you experience the unparalleled freshness and flavor, you might find it hard to go back to store-bought varieties!
Why Your Bread Machine is the Secret Weapon for Perfect White Bread
The beauty of the bread machine lies in its set-it-and-forget-it convenience. It takes care of all the hard work – the precise mixing, the vigorous kneading, the critical proofing, and even the baking – all within one compact appliance. This means no sticky dough on your hands, no wondering if it's kneaded enough, and no worrying about inconsistent oven temperatures. For busy individuals or those new to baking, the bread machine is an absolute game-changer, especially for foundational recipes like white bread.
Beyond convenience, using a bread machine for your easy homemade bread machine white bread offers consistent results. Each loaf emerges with a reliable texture and flavor, making it an excellent "starter" bread for anyone looking to build their baking confidence. It truly democratizes the art of bread making, allowing you to produce high-quality, delicious loaves with minimal effort. Think of it as your personal baker, tirelessly working while you tackle other tasks, leaving you with only the pleasant task of enjoying the fruits of its labor.
The Secret to a Soft, Buttery Bread Machine White Loaf
The difference between a good loaf and an extraordinary one often comes down to a few key ingredients and how they interact. For a truly soft, buttery, and high-rising bread machine white bread, pay close attention to these elements:
- Bread Flour: While all-purpose flour can work, bread flour is the MVP for this recipe. Its higher protein content (typically 12-14%) develops stronger gluten strands during kneading, resulting in that desirable chewy texture and a much better rise. This is what gives your loaf its signature fluffy and springy texture with a light, airy density.
- Warm Water: Yeast is a living organism, and like all living things, it thrives in the right environment. Water warmed to between 110-120°F (43-49°C) is crucial for activating the yeast effectively. Too cold, and the yeast won't wake up; too hot, and it will die. A kitchen thermometer is your best friend here.
- Butter: This is where the "buttery" in our soft and buttery loaf comes from! Unlike many basic white bread recipes that use oil, butter contributes a richer flavor and a more tender crumb. It also helps to keep the bread moist and prevents it from drying out quickly. This is a key differentiator that elevates the taste profile, making it perfect for sandwiches and toast.
- Yeast: Always use active dry or instant yeast specifically designed for bread machines or baking. Ensure your yeast is fresh; expired yeast is a common culprit for loaves that don't rise. Store it in an airtight container in the fridge or freezer to prolong its life.
- Sugar: A small amount of sugar not only adds a subtle sweetness but also acts as food for the yeast, helping it to activate and proof vigorously.
- Salt: Essential for flavor, salt also plays a vital role in controlling yeast activity, preventing the dough from over-rising too quickly, and strengthening the gluten structure. Don't skip it!
The Importance of Ingredient Order
For most bread machines, the order in which you add ingredients is critical. Typically, liquids go in first, followed by dry ingredients, and finally, the yeast is placed on top of the flour. This separation prevents the yeast from activating prematurely with the liquids or coming into direct contact with salt, which can inhibit its growth.
Step-by-Step Guide to Your Fluffy White Bread Machine Loaf
Making your own bread machine white bread is incredibly straightforward. Here’s how to do it:
- Gather & Measure: Have all your ingredients ready and measured precisely. For best results, use a kitchen scale to measure flour and liquids, as volume measurements can vary. This recipe typically yields a 1.5 lb or 2 lb loaf; adjust quantities according to your machine's capacity and recipe instructions.
- Add Liquids: Pour the warm water (or milk, for an even richer loaf) and melted butter into the bread machine pan first.
- Add Dry Ingredients: Carefully add the sugar, salt, and then the bread flour. Gently level the flour to create a smooth surface.
- Add Yeast: Make a small indentation in the center of the flour (don't go all the way down to the liquids) and add the yeast there. This keeps it separate from the liquids until the mixing cycle begins.
- Select Cycle: Place the pan securely in your bread machine. Select the "Basic" or "White Bread" cycle. Most machines also offer crust settings (light, medium, dark); choose your preference.
- Press Start: Let your bread machine work its magic! It will mix, knead, proof, and bake, typically over a 3-4 hour period.
- Cool & Enjoy: Once the cycle is complete, carefully remove the bread pan (it will be hot!) and immediately turn the loaf out onto a wire cooling rack. Allow the bread to cool for at least 30-60 minutes before slicing. This is crucial as it allows the internal structure to set and prevents a gummy texture.
This hands-off approach truly makes homemade bread accessible to everyone. In just 5-10 minutes of prep time, you set the stage for a delightful loaf!
Troubleshooting & Pro Tips for Perfect Bread Machine White Bread
While bread machines are largely foolproof, occasional issues can arise. Here are some common troubleshooting tips and ways to elevate your bread machine white bread:
Common Issues & Solutions:
- Dense Loaf: This often means too much flour, not enough liquid, or old/inactive yeast. Ensure precise measurements and check your yeast's expiry date.
- Loaf Didn't Rise: The culprit is almost always inactive yeast (too old, water too hot/cold, or direct contact with salt).
- Loaf Rose Too Much/Collapsed: Too much yeast or too much liquid can cause over-rising, leading to a sunken top. High altitude can also contribute; try slightly reducing yeast or liquid.
- Uneven Crust: Some older bread machines might bake less evenly. Experiment with crust settings.
Pro Tips:
- Weigh Your Ingredients: Seriously, this is the #1 tip for consistent results. A cup of flour can vary significantly in weight depending on how it's scooped.
- Adjust for Altitude/Humidity: Bakers in high altitudes or very humid/dry climates may need to slightly adjust liquid or flour amounts.
- Customize Your Crust: Most bread machines have settings for light, medium, or dark crusts. Don't be afraid to experiment to find your ideal.
- Add-Ins: While this is a basic white bread, you can subtly enhance it. A tablespoon of dry milk powder can make the crumb even softer and richer. A touch of honey can deepen the flavor profile.
- Serving Versatility: Your homemade white bread is incredibly versatile. It's divine as toast, the ideal base for sandwiches (think BLTs, tuna melts, or classic PB&J), and makes fantastic garlic bread. Don't let stale bread go to waste; turn it into crunchy croutons, French toast, or even a comforting bread pudding.
- Storage: Store your cooled bread machine white bread in an airtight container or bread bag at room temperature for 3-5 days. For longer storage, slice the loaf and freeze in a freezer-safe bag for up to 3 months.
Making homemade bread machine white bread is an incredibly rewarding experience. The process is simple, the results are consistently delicious, and the aroma alone is worth the minimal effort. You'll quickly discover that the soft, buttery texture and fresh taste of your own creation far surpass anything store-bought. So, set aside those preconceived notions about complex baking, embrace the convenience of your bread machine, and prepare to delight your family and yourself with the best fluffy white bread you've ever tasted. Happy baking!
